DIY Ceramic Coating Gone Wrong? Steps For Fixing
I received some great feedback on one of my recent blog posts which detailed how to apply ceramic coating at home for beginners, with a lot of people expressing that they wanted to give it a try themselves. However, one common concern amongst readers was, what happens if the ceramic coating goes wrong?
For many enthusiast detailers who have no experience working with ceramic coatings, it can be a daunting proposition, as there are plenty of horror stories online of failed attempts that have lead to their paintwork looking worse instead of better.
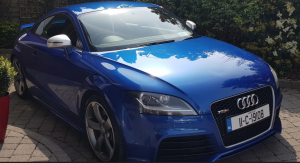
After going through the process myself, I can say the coating process was nowhere near as difficult as the internet experts would lead you to believe, but that is not to say it is without some risks.
As Ceramic coating is semi-permanent, it means there is less room for error when applying.
Luckily, even if you do mess it up, you will be glad to know that there are ways to fix ceramic coating if the application goes wrong.
Before we get into the fixes, let’s look at the different ways a ceramic coating attempt can go badly.
How Can Ceramic Coating Go Wrong?
There are a few different things that can go wrong if you are not careful when applying a ceramic coating to your car. Let’s take a look at some of the most common issues people face.
High Spots / Streaks / Smears In The Coating
High Spots are probably the most common issue faced when ceramic coating a car. These are very easy to miss unless you are working in an area with appropriate lighting. When I was coating my car recently (outside) I thought it was following the process to a tee, but still ended up with some high spots which I failed to see as a result of working under natural light.
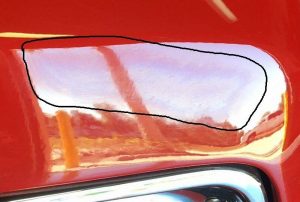
High Spots occur when the coating on the surface of the paint has not been levelled out evenly and the amount of coating in one area sits higher than the surrounding areas.
High spots will often give off a rainbow or steaking effect on the paintwork. Below is an image from Mike Phillips of AutoGeek which gives a good example of how a high spot looks in a Ceramic Coating.
How to Avoid High Spots in Coating
The most common factor in not noticing a high spot is due to inadequate lighting. It can make identifying a highspot a lot more difficult, which in turn gives the affected area more time to harden making it more difficult to remove.
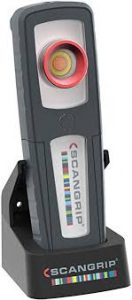
The use of an extra light source such as a detailing inspection light or a Scan Grip torch can help find high spots before they have a chance to cure and harden in the paint.
When applying ceramic coating you should be working on small sections/panels of the car at any one point. You should spend time on that section and make sure the coating is levelled and residue removed before moving on to the next section.
One common mistake people make is they try to apply the coating on a large area at once.
If the area you are working on is too large, it makes levelling increasingly difficult which in turn can lead to high spots and uneven application. Ceramic coating application should never be rushed!
How to Remove High Spots in Coating
There are several different ways you can go about removing high spots in Ceramic Coating. The fix needed usually depends on how long the coating has been sitting on the car, and how much it is cured. ( The more cured the coating, the harder it is to fix ).
This is why it is important to catch high spots as early as possible.
Below are the steps you can follow to fix a high spot ( In Order of severity)
1)Level the Coating with a Microfiber Cloth
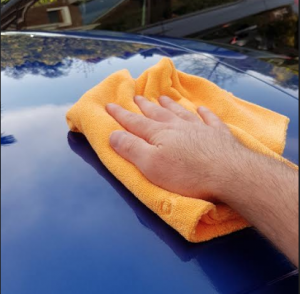
The first thing you can try is to level the coating with a microfiber cloth. This will usually only work if the coating was applied a very short time ago.
As the coating cures, it hardens more and more. Once it gets to a certain stage of hardness, you won’t be able to level it with a cloth.
You may get very lucky and this will work for you.
If you can still see the high spot, move on to step 2.
2)Apply more Coating To the Affected Area
The next thing you can try is to apply another small layer of ceramic coating over the affected area. Sometimes this helps to blend the spot in with the surrounding area and make the high spot almost invisible.
One thing you need to watch out for here is that you don’t overdo it with the extra layer as you could make the situation worse. Only use a very small amount of coating on the applicator pad for the fix. ( 1 to 2 drops is all that is needed )
If you find that this hasn’t worked – you will need to move on to step 3
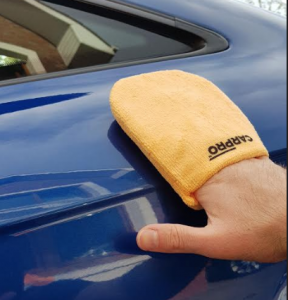
3)Polish By Hand to Remove The Coating
Now we are getting into the more severe actions to try and fix the high spot. If the above 2 methods don’t help, you need to try and remove some of the coatings to flatten the high spot.
For some coatings, it might require less work and a less aggressive product and approach and for other coatings, it might require a more aggressive product and approach. Again – the length of time the coating has been sitting on the paintwork also comes into play here.
My suggestion is to first try a hand polishing pad with some light cut polish ( Something with very little abrasiveness like Meguiars Mirror Glaze Ultra Finishing Polish). In this case, you don’t want to completely remove the coating you just want to remove a tiny layer to level the high spot.
If you find that this does not remove the high spot, you need to move on to step 4.
4)Compound / Machine Polish To Remove The Coating
If hand polishing the car does not work, you need to move on to using a Machine Polisher combined with a more aggressive compound.
Having to go back over a car you have coated and abrade the paint to remove a high spot is not only time consuming it’s also working backwards in the process as now you’re removing both the coating and some level of paint.
This is the worst-case scenario for fixing the coating, but one that is guaranteed to remove the high spot.
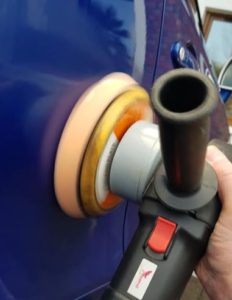
For this, you will want to grab a Medium to heavy cut pad and combine it with something with a decent level of cut. ( I find Menzerna Heavy Cut Compound particularly good )
Once you have polished back the high spot in the coating, make sure you use some IPA wipe or Panel Prep Product before applying the follow-up layer of coating to the treated area.
High spots are usually the most common issue with a Ceramic Coating Application, but what else can go wrong?
Applying Ceramic Coating Over Badly Prepared Paint
One of the most (if not the most ) important aspects of installing Ceramic Coating is prepping the paintwork. Preparing a car for Ceramic Coating involves full decontamination of the paintwork. This is carried out to ensure there are no impurities on the paintwork which will prevent a proper bond between the coating and the surface of the paint.
If this step is not done correctly, you are going to get a premature failure of the Ceramic Coating and it won’t last as long as intended.
Applying Ceramic Coating Over Swirls/Damaged Paint
Similar to the above point – preparation is key, and that includes the finish of the paintwork.
99% of the time it is advised to do some sort of machine polishing to remove any swirls or scratches in the paint. If this step is not completed, you will be applying a coating over a mediocre finish and you will achieve nowhere near the same levels of gloss and shine as you would with properly prepared paintwork.
I have heard some people complain that their ceramic coating looks “average”, but on further inspection, the finish of the paint underneath the coating is the issue.

Tips For Applying Ceramic Coating
- Preparation is key – Follow my guide here if you need help
- If you are working outside make sure you don’t attempt to apply the coating in direct sunlight. These products are not designed to be applied in high temperatures and can make the product difficult to work with and you may not get the result you are looking for.
- Check the weather forecast for the following day or two and make sure you feel that you can keep the car dry until the coating cures properly.
- Work in SMALL sections on the paintwork. A little goes a long way with a ceramic coating so don’t be tempted to overuse the product and try to apply it to big sections of the car at a time.
- As I mentioned above, Have a light source with you or look at the car from different angles, this will help you to identify any high spots or uneven coverage of coating.
- Don’t rush the process.
If you have any other tips or questions about a ceramic coating application, feel free to reach out to me via the comments below or even better come say hello on the forum.
Until next time
Happy Detailing!
Darren
Go Home
About the Author – Darren O Hara
Darren is the founder of the DriveDetailed blog and is a keen detailing enthusiast living in the rainy south of Ireland. When he is not cleaning his car he is always researching ways he can improve his techniques and enjoys testing out new products.
Darren currently drives an Audi TTRS and is a big fan of performance cars.
You can follow Darren on Instagram @darrenoharacork

11 thoughts on “DIY Ceramic Coating Gone Wrong? Steps For Fixing”
Darren, you do a totally fantastic job on all your posts…”how-to’s”…product reviews.
Thank you!
Such a wonderful blog about ceramic coating gone wrong and I appreciate your effort for bringing this in to notice. Great blog indeed, will visit again future to read more!! Thanks a lot for this amazing blog!!
It’s a great source of knowledge; I think it will be helpful for lot of people who are looking for ceramic coating gone wrong . Thank you very much for sharing this article, this is really helpful for me, thanks again!
Wonderful information, thanks a lot for sharing kind of content with us. Your blog gives the best and the most interesting information. I wonder if we can gather such practical information about ceramic coating gone wrong it, a great post definitely to come across.
Can you e mail me, I have a question on a botched front end that got coated then drove in the rain or appears ? I can send pics in e mail [email protected]
Hey Todd – [email protected]