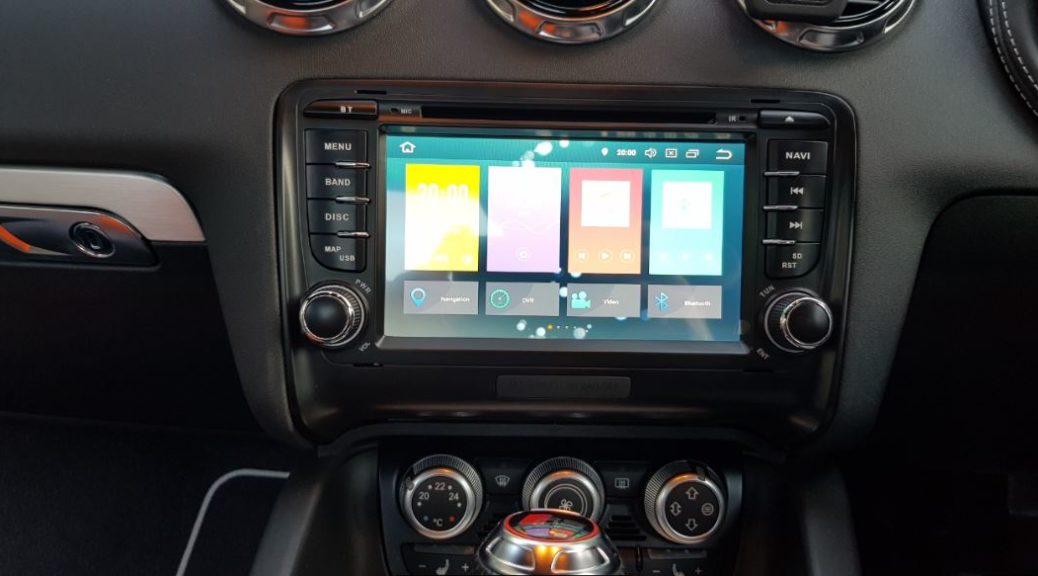
Xtrons Audi TT Installation – How to & Product Review
As some of you may already know I recently changed my car to a MK2 Audi TTRS. I have owned the car for a couple of months now and I must say it is the best car I have ever owned. Both the looks and the performance are amazing.
Although I bought this car mainly for the driving experience, one thing that it was lacking was the “tech” in the car – particularly the radio and entertainment system. It begs belief how Audi could fit such a basic radio in which is supposedly the top of the range TT model. If it was an old car you may understand, but to be fair my one is 2011 – you would at the very least expect Bluetooth capability!
The interior of the TTRS is absolutely sublime and everything inside it is top quality. The basic-looking radio stood out a mile and really took from the appearance of the interior of the car. I also had no way to play music from my phone other than using an Aux Cable.
It was time to do something about it.
Although this is not a detailing post, I thought I would document the process of fitting an aftermarket head unit to an Audi TT, in the hopes of helping others who may be thinking about upgrading their own Audi Unit.
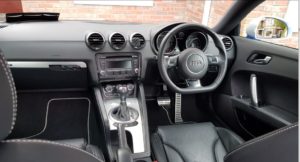
Picture of the Standard Radio in the Audi TT
Which Aftermarket Headunit for Audi TT?
After weeks of research, there seemed to be many aftermarket options for the MK2 Audi TT. My biggest requirement was to be able to use Bluetooth with my phone for calls and also play music via Bluetooth, everything else would just be a bonus. The touch screen was preferred also, as most head units are these days.
I read many reviews online from many other Audi owners and there seemed to be a lot of praise for Android head units produced by a company called Xtrons.
I hadn’t heard of this company before but they seemed to have a good reputation. After seeing pictures of these units installed, I was sold on them! They looked completely OEM in the car, which I was delighted with.
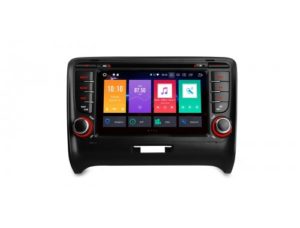
The Model I ended up ordering was PB78ATTP – Pictured Below
A brief Specification of the Xtrons PB78ATTP is as follows :
- The latest Operating System – Android Oreo
- Octa-Core processor and its 32GB ROM memory
- Multitasking Enabled
- Super High-Resolution Screen
- Screen Mirroring From Your Phone
- Multiple Inputs ( SD Card, USB Etc )
- 3G / 4G Module with Hotspot Function ( You can use your phones internet connection )
- OBD2 – A Window for you to Diagnose your Car Status once you have an OBD2 connection ( I luckily already had one! )
- Tire Pressure Monitoring is Available
- Ready to Plug and Play with a reversing camera
As you can see from the above, the Xtrons unit offered far more than the current head unit in the car and was not that expensive so it was a no brainer for me. I also loved the look of it and looks like something that the TTRS should have come out of the factory with, to begin with.
Xtrons PB78ATTP for Audi Review
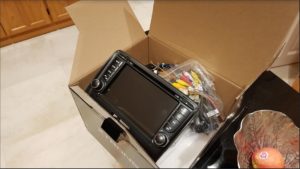
Once I had placed the order with Xtrons it did not take the head unit long to arrive ( i think it was about 1 week from when the order was placed). The head unit arrived in a nice looking box and was well packaged. Once I opened the box I was greeted with the beautiful looking product, some connection wires and an instruction manual.
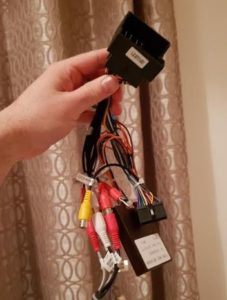
Xtrons Wiring Loom pictured below – Xtrons supply a Quadlock wiring loom that routes all the necessary connections to and from the car into the HU. It includes a Canbus decoder too. If you have a Bose or “standard” audio setup in your Audi then there is no need to make any modifications to this loom. It just works. Ignore the Xtrons site that goes on about needing to make mods to the loom if you’re not running Bose system
I am not a professional or in any way experienced with installing these types of products myself, so coming into this as a total beginner I was hoping that I would be able to do it at home by reading some guides that I found online.
A lot of people were saying that it is a relatively easy job once you have the correct tools ( basically just the radio removal keys ). This unit is pretty much plugged and play with the existing connections you have in the car.
I wished myself luck and began the installation on a weekend when I was free.
How to Install Xtrons Head Unit in an Audi TT
The first things you are going to need to buy is a set of Radio Removal keys ( 4 Keys in total ). You will not be able to remove the existing factory radio without these. These radio keys look like this
These are very cheap and should come in handy if you ever need to take the radio out of your car again.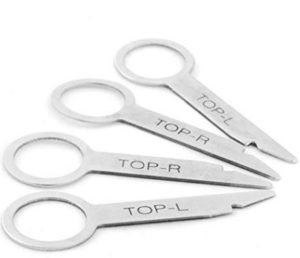
The first step in the installation is the removal of the old head unit. To avoid scratches to the gearstick and centre console, I’d recommend putting a towel or something over them first before you start the removal process!!
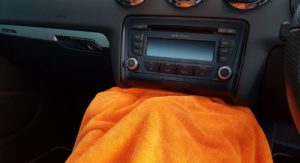
Insert the keys with the rounded part of the skewer pointing towards the centre of the unit. The HU should come out fairly easily if you’ve got the keys in right.
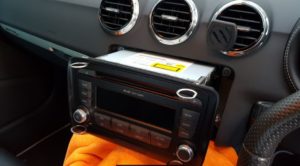
As the HU comes out, you’ll need to disconnect first the Airbag off light which is at the lower half of the unit, then the Quadlock then the radio aerial. They all just pull-off, apart from the Quadlock which has a plastic U-shaped lever you’ll need to lift first. Note: In my case, the airbag off light took a lot of force to pull off.
I thought that I was doing it wrong but a bit of brute force got it off in the end.
The next step is to Move the airbag light from the old HU to the new one. It’s pretty self-explanatory once you get to look at it.
Now you are ready to route the new cables ready for the new HU. I found it easier to get all the cables for the new HU prepared in the car and then to connect them to the HU as the last step.
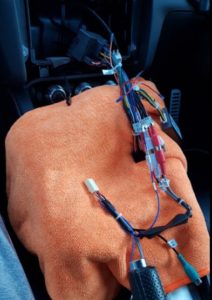
Once you are ready, you need to connect all the cables up to the Xtrons head unit. This should mostly be handled by the Quadlock supplied by Xtrons.
The last step is to Mount the new Headunit. The new HU slides in the same way as the old – almost. There are two things to watch out for;
a) Make sure that you lift the rear of the unit as it gets close to home. There are a pair of guides on the sides that need to match up with supports in the cage in the car. If you don’t do this, you’ll get the HU tipping down and it won’t push fully home.
b) The securing clips are not anywhere near as good as on the OEM HU. They are fitted only on the top and they are fiddly to disengage if you need to – so try to make sure you get everything right before you push it all the way home. Pay attention too to the little bit of plastic that sits under the HU and separates it from the climate controls. It’s fiddly to get in the correct position
Your new Xtrons unit should now be installed and ready to use.
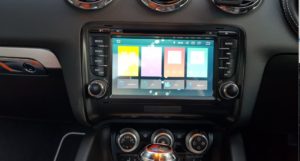
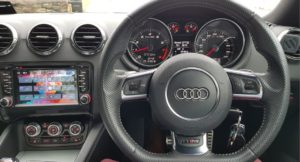
I think you will agree – it looks 100000x better! The job took about 30 minutes in total to complete.
Xtrons Audi Headunit – Worth it?
So far so good, I am very happy with the head unit. Some things I like so far
- Screen Resolution is very clear and bright
- It is very responsive and lightning-quick ( Octa-Core )
- Better sound quality than the original head unit with the ability to play with the equalizer extensively
- Works seamlessly with the steering wheel controls
- Can use my phone as a hotspot so can use google chrome app, Spotify etc on the unit itself
- Doesn’t seem to put a heavy drain on the battery of the car
- Very customizable – wallpapers, backgrounds etc
- Comes with Torque App Pre Installed so I can monitor a lot of the cars real-time information
I will update this post when I have spent more time with the head unit, but for now, it is a big thumbs up for me and I am glad I made the upgrade.
If you are trying to install an Xtrons Android unit in your car and you have any questions – please feel free to reach out to me in the comments and I will do my best to help you along with the process.
About the Author – Darren O Hara
Darren is the founder of the DriveDetailed blog and is a keen detailing enthusiast living in the rainy south of Ireland. When he is not cleaning his car he is always researching ways he can improve his techniques and enjoys testing out out new products.
Darren currently drives an Audi TTRS and is a big fan of performance cars.
You can follow Darren on Instagram @darrenoharacork


15 thoughts on “Xtrons Audi TT Installation – How to & Product Review”
cheers Darren. where did you buy the unit from it looks great and think in=m ready to order now I’ve seen this post and how easy it was for a novice to install
HI Steve
I am a complete novice and managed to do it , so i would say it is fairly straightforward. I am living in Ireland so i bought directly with xtrons.co.uk as they ship from there. It depends where you are based.( I would recommend buying from Xtrons directly as they have a 2 year manufacturers warranty )
if you go ahead and have any questions about the installation let me know and i will do my best to answer.
Hi, did you adapt the gliders on the radio so ot can fit perfectly in the space in the dashboard?
Another questions; the rds info of the radio station name is not displayed in bis display of the car. Have you solved this?
Hi Marcel , I did not have to adapt the gliders for it to fit into the space. With a bit of fiddling , it seemed to fit flush into the space without a problem.
Regarding the RDS info , i dont have a solution to this ( But then again i have not tried ). If you are fitting this into a TT , there is plenty information on Xtrons over on the owners forums , im sure some one might have the answer there.
https://www.ttforum.co.uk/forum/
How is the radio holding up? Just ordered one and wanted to make sure you’re still satisfied w/ the product. Are you enjoying it? Also – Have you managed to get Apple CarPlay to work with it?
Hi Robb. All going good and still happy with it! No complaints , its all i ever needed really. Plenty of features. Have not tried Apple CarPlay myself with it as im on Android , but i know another TT owner did a post about the same unit and apple car play , you can see it here.
https://nickscarblog.com/diy/xtrons-7-screen-apple-carplay-retrofit
If you have any questions when it arrives feel free to reach out.
Darren
Thanks, Darren.
Hi Darren! Thanks for your information. I have problem with my subwoofer. Its not work. I dont know to do the cable “subwoofer”. I dont have any line to tjis in my car.
Another problem is the android radio doesn’t fit perfectly exactly from the bottom. You know the reasons? Thanks in advance and sorry for my english lol. Best wishes!
Hi Elmos,
I dont have a subwoofer in my car so i cant give you advice on this. However , im sure if you ask the question over at the TT forum here ttforum.co.uk/forum/ you will get an answer.
The problem with the radio not fitting at the bottom could be 2 reasons.
1. There may be some cables at the back of the unit which are stopping the radio from sitting back fully. You should check that all the cables are tidy and not preventing it from sliding it back
2. Sometimes you need to slide it in at an angle for it to fit properly. When you are inserting the headunit , it is best to try keep the rear of the unit elevated and slide it in at an upwards angle
Hi all.
I’ve just tried….twice…to fit the latest Xtron Headunit.
All works fine except no matter what I try….it does not lock into position. Well the top does…with3mm of movement!!! The bottom does not lock at all. Xtrons told me to cut the extra tabs from the lower bracket…so it replicated the top. Still no good.
Any ideas.
Have fitted many Headunits… generally universal where there is some sort of adjustment. These have non and are supposed to lock into place.
Car it a 2014 TDI Quattro MK2.
Looks like returning for refund.
Hi Graham,
That sounds like a pain. Sometimes the wiring loom can prevent it from being pushed all the way in if the cables are not placed correctly at the back. I would check those , but since you have already checked twice im not sure that is your problem.
Another thing i noticed that was important was the angle at which you slide the HU into the housing.
“Make sure that you lift the rear of the unit as it gets close to home. There are a pair of guides on the sides that need to match up with supports in the cage in the car. If you don’t do this, you’ll get the HU tipping down and it won’t push fully home”
Hope you get it sorted!
I recently fitted the xtrons unit to my 2008 Audi TT MK2 2.0 tfsi. All good but the display seems to be a bit washed out – particularly using sygic maps etc. The only adjustment seems to be the brightness.
Any ideas?
Ian Dublin
Hi Ian
You might be able to go into the “Factory Settings” menu and mess around with some settings. I had to do something similar to sort out audio volume levels with mine. If you are unsure how to get into the factory settings , there are a few videos on youtube.
Alternatively you can try upgrade your unit to the latest firmware. If you email xtrons support they will send you the latest firmware to install.
Hope you get it sorted!
Hi Darren – thanks for that. I got into the factory settings and found the contrast settings so all well now.
Regards
Ian
Good stuff – Enjoy!